Table of Contents
The Mixer window can be opened by pressing Alt + M, by selecting Mixer in the View option of the Main Menu, or by clicking the Mixer button on the Main Toolbar.
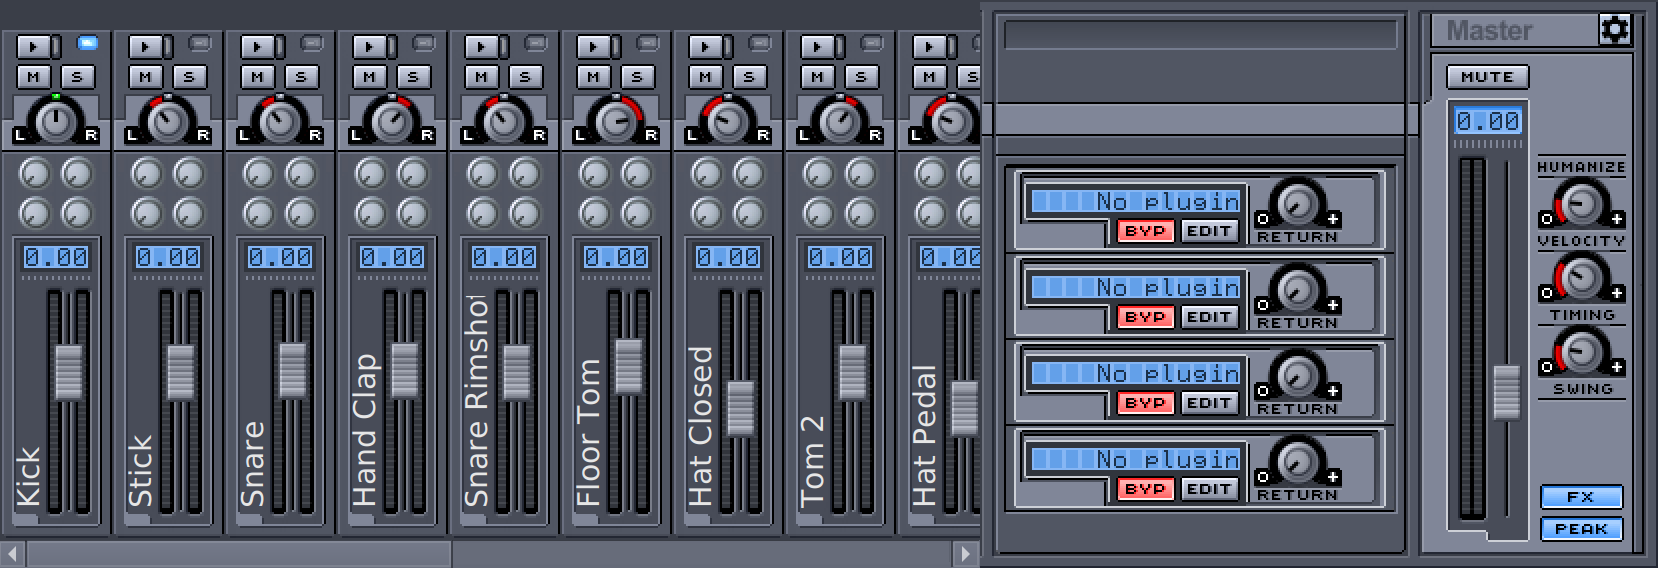
The Mixer consists of 3 sections (from left to right): the one containing the Instrument Channel Strips and Component Channel Strips, the FX Plugin Rack, and the Master Fader Strip. The Hydrogen Mixer works very much like a hardware mixer does: it lets you set the volume, pan, FX and several other things for every instrument as well as the volume of all of these sources mixed together.
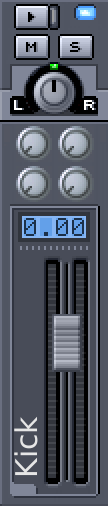
 : lets you trigger the instrument at maximum velocity.
![[Tip]](../img/admonitions/tip.svg)
Tip This is quite handy for checking clipping.
 :
lights up whenever this instrument is triggered, e.g. by a note in a pattern or an external MIDI controller).
:
lights up whenever this instrument is triggered, e.g. by a note in a pattern or an external MIDI controller).
 :
shows whether the instrument is currently selected (in both the Mixer and the Pattern Editor).
:
shows whether the instrument is currently selected (in both the Mixer and the Pattern Editor).
![[Note]](../img/admonitions/note.svg)
Note If the Input mode is set to
Instrument, incoming MIDI events and virtual keyboard keys will trigger only (pitch shifted) sounds of the currently selected instrument.Tip An instrument can be selected by interacting with its Instrument Channel Strip in the Mixer, by interacting with its associated row in the Pattern Editor, or by the corresponding MIDI or OSC command.
 : mutes all sounds related to the instrument (including the preview sound you hear when clicking on the instrument name in the Sidebar of the Pattern Editor).
Note This button is sharing its state with the mute button of corresponding instrument in the Sidebar of the Pattern Editor.
Note This button is sharing its state with the solo button of corresponding instrument in the Sidebar of the Pattern Editor.
 : sets a pan value affecting all note played using this instrument.
 :
the four pre-fader FX send knobs that determine how much of this instrument will be sent to
the effect plugins in the FX Rack.
:
the four pre-fader FX send knobs that determine how much of this instrument will be sent to
the effect plugins in the FX Rack.
Fader and LCD: the fader next to the instrument's name allows you to adjust the volume of the instrument which will be applied on top of all the individual note velocities, layer gains etc. In the background of the fader a volume unit (VU) meter is included representing the instrument's signal level. The LCD displays shows its peak value.
Tip You can adjust the falloff speed of the peak values in the LCD display via the Appearance tab in the Preferences.

| Note |
|---|---|
If the Create per-instrument outputs option in the Audio Engine tab of the Preferences was selected for the JACK audio driver, Hydrogen will register ports for each instrument. All the options described above will only take effect if in addition the Track output option in the same tab as set to This allows you to route the individual instruments directly into any other JACK enabled application, like Ardour, and gives you a lot more flexibility. |