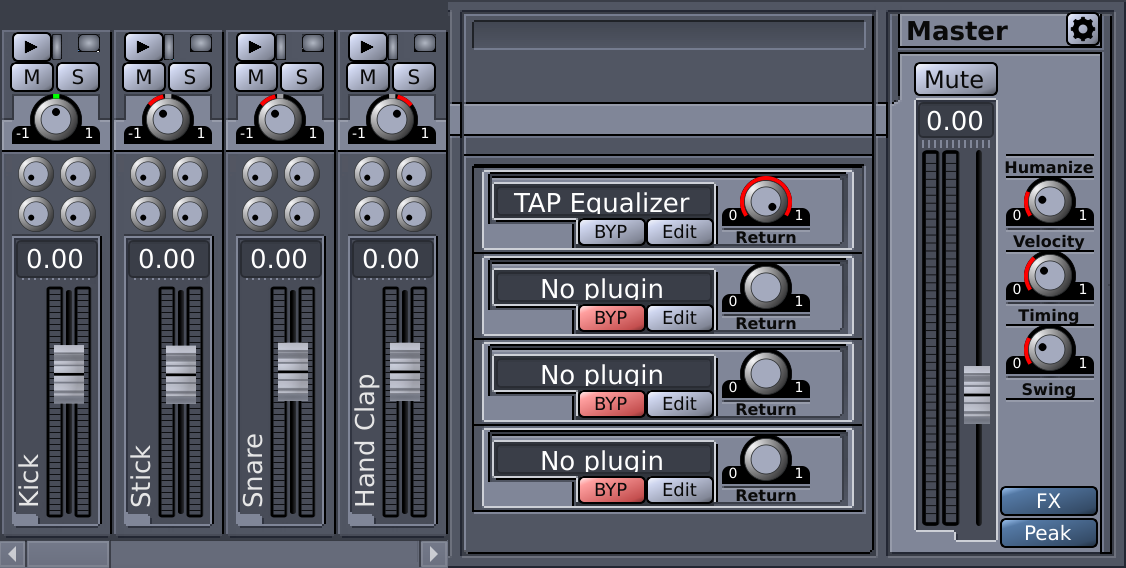
Of course we can always use the Mixer window, either when creating or playing patterns.
The Mixer (see Figure 18.3) is made of a number
independent Instrument Channel Strips, each of these is bound to an instrument, plus a
Master Fader Strip and a
 button to show and hide the
FX Plugin Rack.
Every line features 3 buttons (
button to show and hide the
FX Plugin Rack.
Every line features 3 buttons (


 ), current maximum peak, FX volume control knobs, volume fader, and name of the track. Clicking on
will play the selected instrument, cutting the others. The Mute button
, simply mute that instrument. The maximum peak
indicates the maximum volume reached from the instrument. The peak must
be in a range of
), current maximum peak, FX volume control knobs, volume fader, and name of the track. Clicking on
will play the selected instrument, cutting the others. The Mute button
, simply mute that instrument. The maximum peak
indicates the maximum volume reached from the instrument. The peak must
be in a range of 0.0 and 1.0 (in Figure 18.3 you can
see a few volumes too loud). For a full description of the Mixer and its elements please see Mixer.
![[Tip]](../img/admonitions/tip.svg) | Tip |
|---|---|
Peaks outside that range will get distorted (especially with OSS audio driver). Keep an eye on each VU meter and if distortion appears, turn the volume down for that instrument. |