
The FX Rack can be accessed by clicking the
 button in the Master Fader Strip.
It has 4 slots where you can load a LADSPA effect plugin already installed on your system.
There are dozens of plugins available for download from various sources:
SWH-Plugins: available at http://plugin.org.uk.
CMT: available at http://www.ladspa.org.
TAP: available at http://tap-plugins.sf.net.
Calf plugins: available at http://calf.sourceforge.net/.
LSP plugins: available at https://github.com/sadko4u/lsp-plugins/.
....
![[Note]](../img/admonitions/note.svg) | Note |
|---|---|
Linux Audio Developer's Simple Plugin API (LADSPA) is the only plugin format supported by Hydrogen and it is tailored to be used on Linux platforms. On macOS it's rather easy to get the plugins running as most of their code works on this platform too without any changes. On Windows, however, things are not that straight forward. As of 2022 there are no packages, bundles, or other applications shipping LADSPA plugins for Windows usable within Hydrogen and you have to compile them from source too. But in contrast to Linux and macOS your have to adopt the codebase first (which is most easily done for the CMT plugins). So, it's possible to use plugins under Windows but, unfortunately, not feasible at all. |
You can select a plugin using the FX selector opened by clicking the
 button.
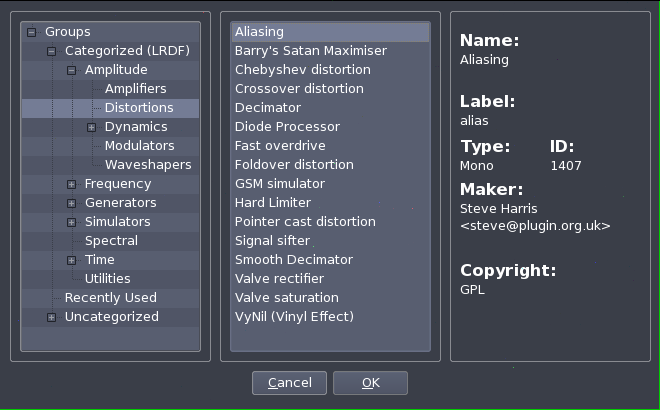
Once you have selected a plugin you will immediately have access
to its parameters.
![[Warning]](../img/admonitions/warning.svg) | Plugins Kill |
|---|---|
A badly designed LADSPA plugin is capable of hanging, crashing, freezing, screeching, overflowing buffers, and even phoning home. If you start having issues with Hydrogen, disable your plugins and see if things improve. Some plugins are not designed for real-time use and some are just plain better than others. |
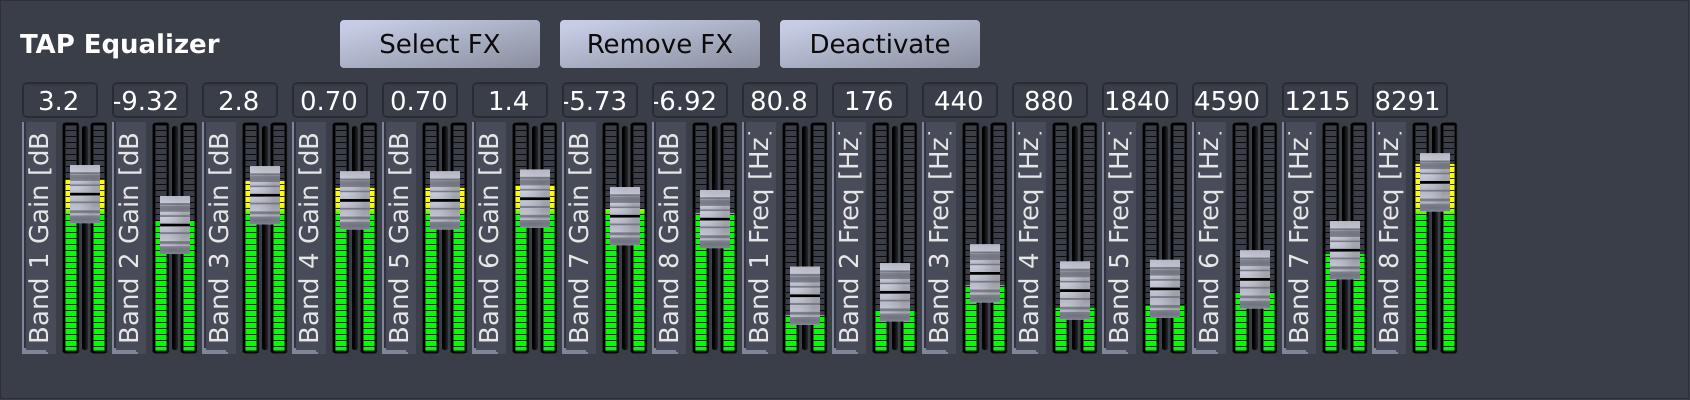
You can select another plugin by clicking the Select FX button. If you quickly want to
enable/disable the effect click the Deactivate button (or the Bypass
 button in the FX Rack).
![[Tip]](../img/admonitions/tip.svg) | Tip |
|---|---|
This can be handy for a quick A/B comparison. |
After you have selected the FX and tweaked it's parameters you can use the Return knob in the FX Rack of the mixer to increase/decrease how much of this FX will be added to the master output.
The FX itself lives in an aux channel. This means it's not directly added into the signal path of any instrument line but a copy of the audio output of each of them is sent to the FX for processing instead. The amount of signal - 0 per default - send by each can be controlled using the pre-fader FX knobs in the corresponding instrument channel strip. The top left one refers to the top-most FX, the top right one to the second FX and so on. This means, in order to get an all wet signal (none of the original signal but just the processed one enters the mix) of an instrument, you have to ramp up the pre-fader FX knob and set the line's fader to 0.
| Note |
|---|---|
Since the FX signal lives in an aux channel it is neither affected by Auto-Stop-Note nor Mute Groups. |