Table of Contents
The Sample Editor allows you to tweak and manipulate your
samples. It can be accessed by selecting a layer in the Instrument Editor and clicking the
 button. It will really speed up the creation of a drumkit since
you can do the fine-tuning of the samples within Hydrogen and avoid a lengthy import-test-tweak workflow using an external application. This mean less switching between Hydrogen and your audio editor
and more time to make music!
button. It will really speed up the creation of a drumkit since
you can do the fine-tuning of the samples within Hydrogen and avoid a lengthy import-test-tweak workflow using an external application. This mean less switching between Hydrogen and your audio editor
and more time to make music!
![[Note]](../img/admonitions/note.svg) | Note |
|---|---|
The changes you make to your samples in the Sample Editor are non-destructive and are saved per song. So, the original sample will not be changed, and you can reuse the same sample in multiple songs with different Sample Editor settings. |
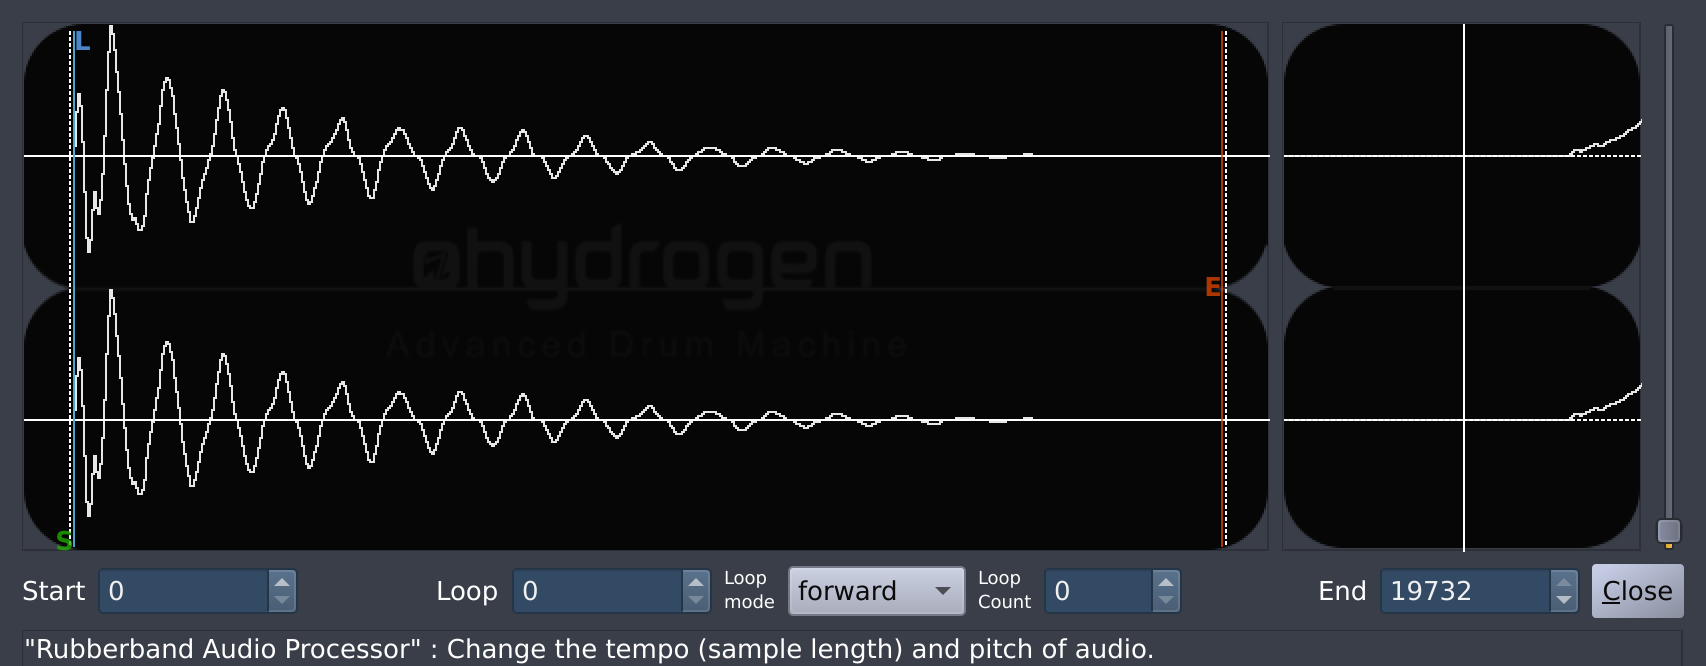
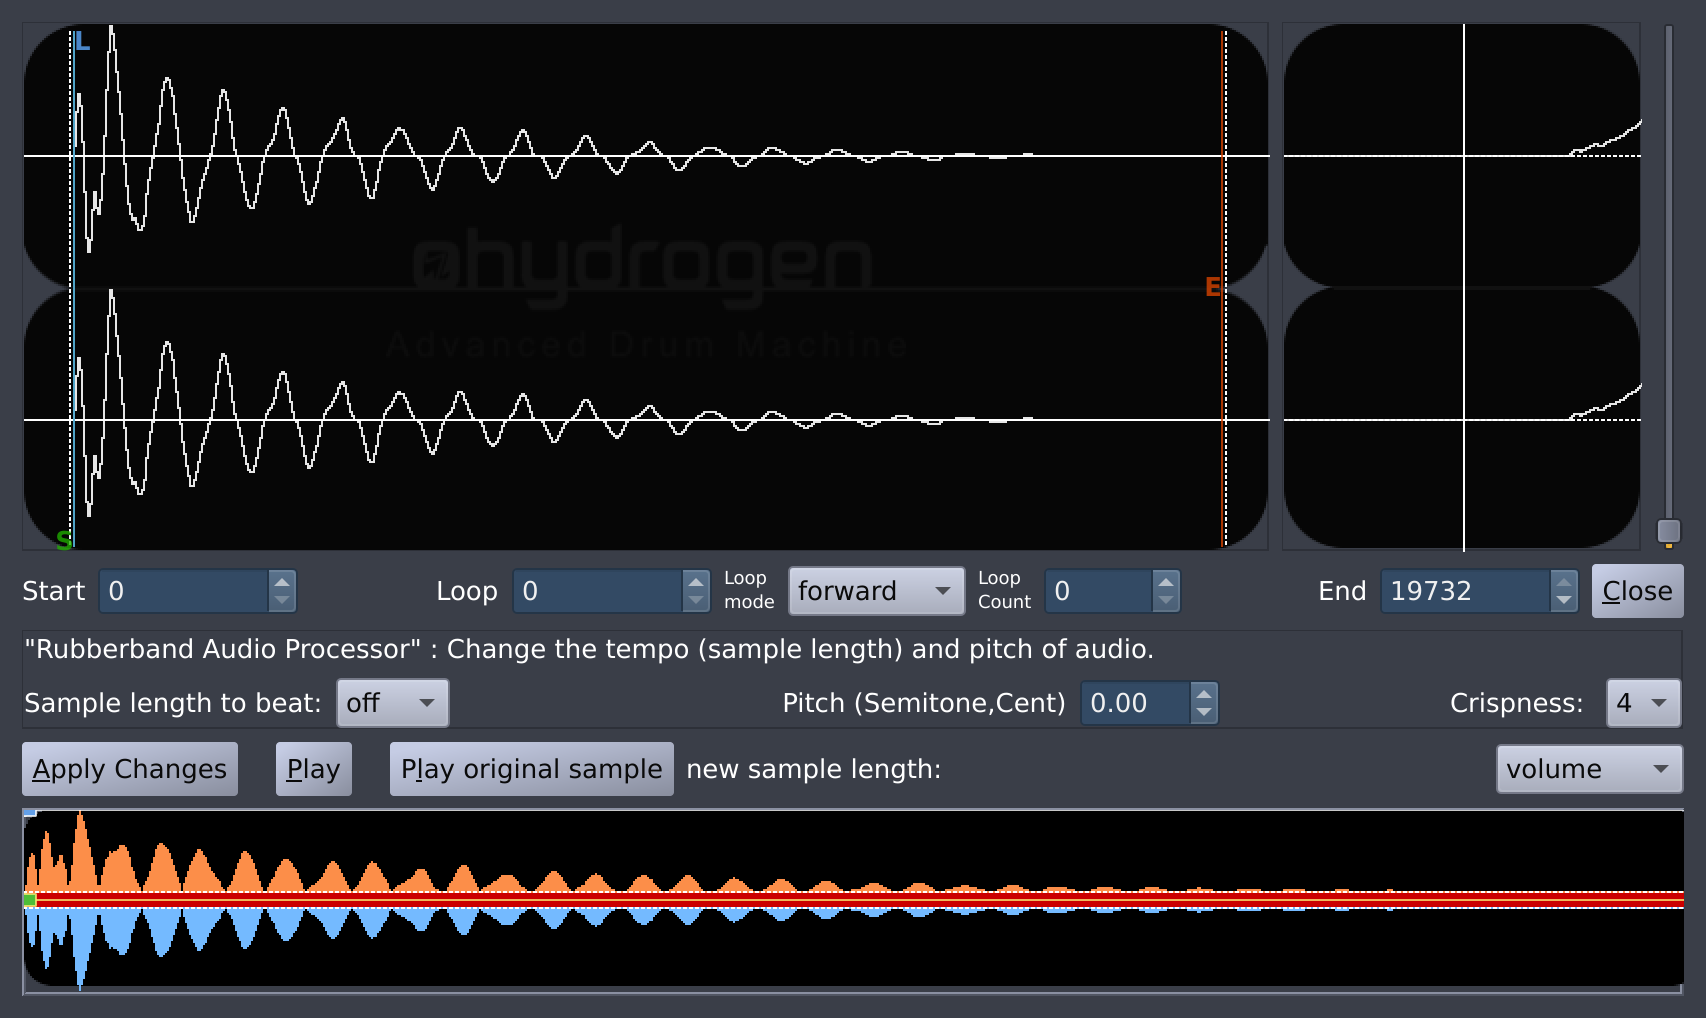
In the larger (left) wave display you can see the wave form of the sample you are about to edit. In there you can set the start, stop, and loop point for the sample by dragging the the 3 markers:
![[Tip]](../img/admonitions/tip.svg) | Tip |
|---|---|
You can easily move one of the markers by grabbing them close to the letter that marks them. |
Underneath you can find a numerical display of the position set for the individual markers as well as some further options. The position of the markers is expressed in number of frames from the very beginning of the sample.
Start: position of the Start Marker.
Loop: position of the Loop Marker.
Loop Mode: specifies the way the individual loops will be played back.
forward: plays the Loop Count loop passages the usual way from left to right.reverse: plays the Loop Count loop passages the backwards (from right to left).ping-pong: plays the Loop Count loop passages alternatively backwards and forwards (starting with backwards).
Loop Count: indicates the number of times the sample will be repeated between Loop and the End Marker. This section will therefore be played back Loop Count + 1 times.
End: position of the End Marker.
Close: exits the Sample Editor.
| Note |
|---|---|
These values will change if you drag the markers, but you can also fine-tune the marker position by using the up/down arrows of the spinboxes, the up/down keys on your keyboard, or by using your mouse scroll wheel while hovering above the spinboxes. |
Whenever you move one of the markers you will see a detail view of the position of that marker on the smaller (right) wave display on the right, making it easy to find the zero-crossings in the sample. This detail window also has a slider next to it that allows you to zoom in and out on the vertical axis. Think of it as a sort of volume 'zoom'.
| Tip |
|---|---|
If you want to hear a preview of the tweaking you have done so far, you first need to press the Apply Changes and then the Play button (both at the bottom of the window) to hear the result. |