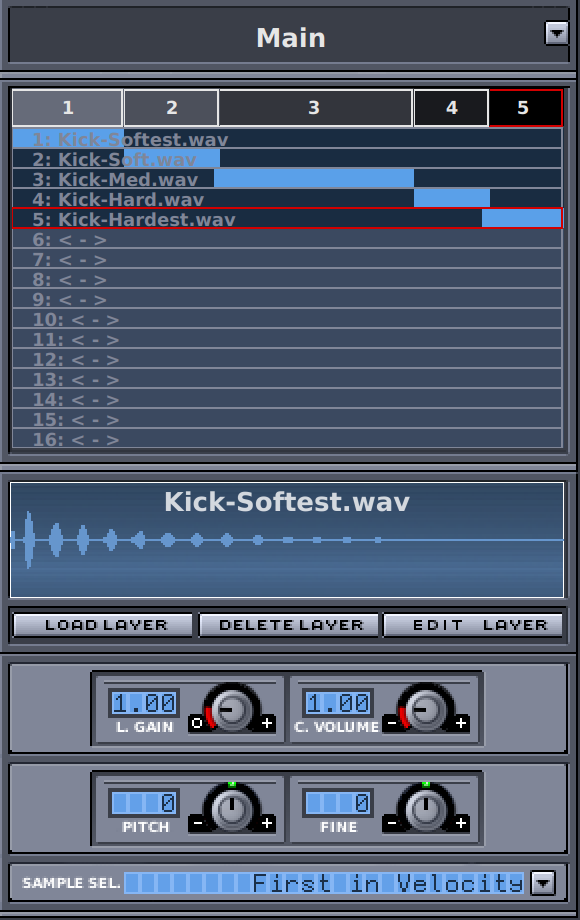
When clicking the Layers button in the Instrument Editor you can adjust the samples and synthesizer parameters of the particular layers of the instrument selected in the Sidebar of the Pattern Editor.

Right below the General and Layers button you find the name of the currently selected component. In the drop down menu accessible by pressing
 you find a list of all components available in the current drumkit and can select them via a left click. Below a separator you can also find three options to
 add a new component, delete the current one, or rename the current one.
![[Warning]](../img/admonitions/warning.svg) | Warning |
|---|---|
The components are shared by all instruments. This means deleting it will delete it including all associated layers from a all instruments and not just the currently selected one. |
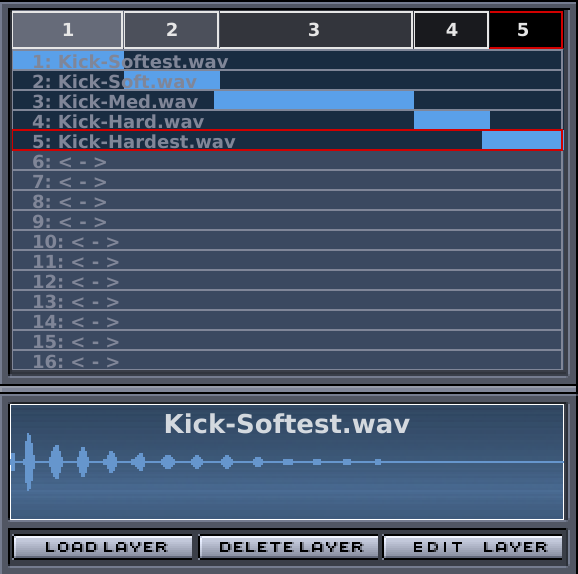
Next you find a listing of all layers of the current component in the selected instrument. The wave form of the sample loaded to the currently selected layer (the one enclosed by a red rectangle) is displayed below.
![[Note]](../img/admonitions/note.svg) | Note |
|---|---|
Empty layers will be displayed as |
Using
 you can load a sample into the currently selected layer, using
 you can delete the current layer, and using
 you can open the Sample Editor to customize the sample loaded to the currently selected layer.
![[Tip]](../img/admonitions/tip.svg) | Tip |
|---|---|
Alternatively you can also double-click the wave display to open the Sample Editor. |
| Note |
|---|---|
When loading a sample it will per-default have its active area set to the whole velocity range. By checking the Set auto velocity option all layers will be assigned an equally sized velocity range corresponding to their layer number (the top-most layer will have a range starting a zero velocity and the bottom-most one that ends at maximum velocity). Note however that this option will overwrite all existing velocity ranges. |
Above the layer listing you find boxes in different shades of grey indicating which range of note velocity will trigger which sample (left: 0 velocity, right: maximum velocity). Left-clicking on any of these boxes will play back the sound of associated sample modulated by the velocity corresponding to the horizontal position of the mouse cursor.
| Tip |
|---|---|
This will be quite handy when adjusting the velocity ranges of the layers. |
You might have already noticed in the picture above or for shipped drumkits in the Hydrogen GUI that a layer row contains a light blue rectangle that those not quite fill the whole row. This rectangle indicates the range in velocity the associated sample should be triggered. This way you can separate samples for soft hits, regular hits, and so on for each instrument (component). Whenever two rectangles do overlap a triggered note with a velocity within this shared range will consult the Sample Selection to determine which sample will be played back. You can adjust the velocity ranges of each layer by left-clicking the left or right end of the light blue rectangles and dragging it to the desired position.
| Note |
|---|---|
If there is a(n accidental) hole between two adjacent velocity ranges, the layer closest to the triggered velocity will be used. |

Having a set of samples containing different sample versions of similar sound for the same note velocity is a good way to make your drumkit sound more natural. After all, drummers for example never hit the drum set twice the exact same way.
Hydrogen tries to emulate this behavior by providing multiple layers with overlapping velocity ranges. How the selection of the resulting sample will take place is for you to decide using the Sample Sel. dropdown menu at the bottom of the Instrument Editor.
First in Velocity: will select the first sample available in the velocity set - the one of the layer most further down in the layer listing.Note This is the way previous versions of Hydrogen were working.
Round Robin: will cycle through the different samples one after another as note a in the same velocity range are played.Random: will select a random sample inside the velocity range for each note played.
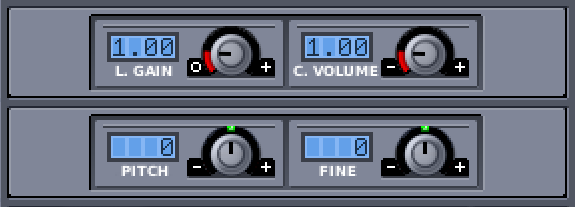
Layer Gain: adds Gain for the currently selected layer and the associated sample.
Component Volume: adjusts the volume of all layers within the current component with respect to the ones of the other instruments.
Tip The resulting audio from all layers of each instrument associated with a certain component can be controlled via its Component Channel Strip in the Mixer.
Pitch: adjusts the pitch of the currently selected layer and the associated sample in quantized steps of half-tones from
-24to+24.Fine: adjusts the pitch of the currently selected layer and the associated sample in quantized steps of cents of half-tones from
-0.50to+0.50.